MKDocs Uploader
Release Info: Latest Release from Jan 23rd 2024, Version 1.1.
About this tool
The MKDocs Uploader is some kind of extension to your MKDOCS setup. It´s not an official extension (you can not install it with PIP) - it might be a useful tool if you want to automate the upload of your MKDOCS webpage and it´s modifications with one simple command. Combining this with a Task and a KeyStroke in Visual Studio Code gives you the opportunity to put your work to your webspace with one simple key stroke directly out of your work environment.
The tool consists of two simple files. One is the config file, a YML file, similar to the mkdocs.yml. This file contains all settings and options for the uploader tool. And there is a PYTHON file mkdocsuploader.py which is the core of the tool. You should not change this second file at all. All settings are done in the YML file.
Installation
Make sure that you have installed WinSCP on your computer. This script uses the script functions of WinSCP for the part of the upload.
The installation is very easy. Download the archive with the two files and extract them into the root directory of your local webpage.
Then open the mkdocsuploader_config.yml with a text editor of your choice. I recommend Visual Studio Code (in the chapter "Much more smarter" you will see why). The blank config file looks like this:
config:
    project_folder: "C:\\path_to_your\\website"
    docs_folder: "docs"
    site_folder: "site"
    win_scp_path: "C:/Program Files (x86)/WinSCP/winscp.com"
    upload_domain: "www.yourdomain.com"
    upload_directory: "www/remotepath"
    upload_user: "your_ftp_user_name"
    upload_pass: "your_ftp_user_password"
    exclude_dirs: ["img","pdf"]
    exclude_file: ["mkdocsuploader.py", "ftp_process.txt", "mkdocsuploader_config.yml"]
    build_include: "true"
    build_dirty: "true"
    build_quiet: "true"
    always_load_assets: "true"
    new_images_only: "true"
    no_upload: "false"
Based upon the following options you need to modify this config file.
Config File in detail
The execution of the tool is very easy by typing python mkdocsuploader.py. But before you do this modify the config file carefully. Here are the details to each single setting and the possible options:
project_folder
This is the local path to your webpage. Please note that the slashes "\" have to be outlined properly in order to be not handled as an escape sequence. So a slash must be entered as \\. Spaces in this path have to be outlined with \u0020. If you have more escpae characters like language specific signs, please read this document carefully and adapt your path accordingly: Escape Characters in YAML Files.
Example:
Let´s assume your mkdocs page is stored in a folder on Drive D: and in a direcotory you have some spaces. This is the path on your computer:
D:\MyPages\My nice mkdocspage
The correct setting for project_folder would be:
D:\\MyPages\\My\u0020nice\u0020mkdocspage
\ has been repladed with \\ and the two spaces in "My nice mkdocspage" have been replaced with \u0020
docs_folder
This setting determines the DOC folder of your webpage. Usually the folder is named "docs" - change this in case you have entered a none standard directory as your DOC folder.
site_folder
This setting determines the SITE folder of your webpage. Usually the folder is named "site". It stores all files to be uploaded after a build process - change this in case you have entered a none standard directory as your SITE folder.
Settings for the FTP Process:
win_scp_path
The script utilizes the built-in function of the free FTP software WINSCP. So in order to use this tool you must have installed this tool in advance. Specify the exact path to the winscp.exe (not the winscp.com) file on your computer so that the script can find it.
upload_domain
This is the Domain for the upload of your site.
upload_directory
This is the directory on your webspace which will be the target directory of the upload. Some webspaces require the full UNIX path of the target directory. Enter the full qualified path or the subfolders added to the domain.
upload_user
This is your FTP user name.
upload_pass
This is the password of your FTP user.
exclude_dirs
This setting determines the folders which you want to ignore completely during the upload process. This is very useful for static directories or directories with common, unchanged content. When I create a new content with images I always upload the new images separately. By excluding the image folder, the old, existing content with images remains untouched - it´t not uploaded again, it´s not even moved to the FTP process for file comparison, which saves a lot of time. Directory names have to be put in Quotations and are separated with a comma.
Example:
exclude_dirs: ["img","pdf"]
If you do not want to exclude directories leave to square brackets as setting:
exclude_dirs: []
exclude_files
If you want to exclude specific files (they can occur in any of the directories identified for the upload), put them into this setting. File names for exclusion have to be put in Quotations and are separated with a comma.
Example:
exclude_files: ["mkdocsuploader.py", "ftp_process.txt", "mkdocsuploader_config.yml"]
If you do not want to exclude files at all leave to square brackets as setting :
exclude_files: []
Security Warning
The mkdocsuploader.py creates a FTP Script file which is executed with WinSCP. Currently there is no solution to handle the connection with SSH Keys (I´m not sure if this will come up soon). This means that your FTP credentials are exposed in the Config File of this script in the settings ftp_user and ftp_pass. And they are also stored temporarily in a file called ftp_process.txt. This file is eliminated after use but for security reason you should always exclude these three files
ftp_process.txt
mkdocsuploader.py
mkdocsuploader_config.yml
And you should also take care of unauthorized persons not having access to these files locally.
build_include
Setting this to true means that you can save some time - mkdocsuploader will build the page in advance before the upload. You do not need to run mkdocs build. Running the final command will create a build + upload process at once.
build_dirty
Setting this to true will create new files for new content only. If you have build new content today this new content will build + uploaded this new content only. All old items remain as they are. This only works when build_include was set to true. If you set this to false a complete build from scratch will take place.
build_quiet
If you set this to true the build process will be performed quietly, without messages for each single file. It´s the equivalent to
mkdocs build --quiet
The quiet-Parameter is added to the internal build process
always_load_assets
When you set build_dirty to true, the assets folder, generated by mkdocs might not be up to date. This setting is only recognized when you have set the build_dirty option to true because a full build will include the assets folder anyhow.
new_images_only
Putting this setting to true will also upload new images, but not old images. New images are detected by the file_date - if there is an image file (jpg, png or gif) with todays date, the image will be uploaded. This setting is ignored when you have set no_upload to true, build_dirty to true or when you have excluded a folder that contains images.
no_upload
If you put this setting to true no upload will be performed by the script. Why is this useful? Well, you might want to use the benefit of this tool by integrating it into your work environment (see Chapter "Much more smarter ...") but want to perform the upload on your own.
Executing mkdocsuploader
The execution is very simple. Simply type this command in the command prompt:
python mkdocsuploader.py
The script will run and will inform you about the build and/or upload process. If you encounter errors please see the details in the output of the script and make your changes before re-running the command.
Much more smarter ...
... is the integration of this tool into your workflow. Visual Studio Code allows you to create "Tasks" (which is a simple integration of the command mkdocsuploader.py) and you can create your own KeyBinding to this TASK. The outcome is a simple KeyStroke after you have finished your work on your page. This KeyStroke will start the build and upload for you. So the whole output is managed and done with one KeyStroke.
Creating a TASK in Visual Studio Code
TASKS in Visual Studio Code are very useful. In this example we define a TASK that executes the mkdocsuploader.py Script. First look for
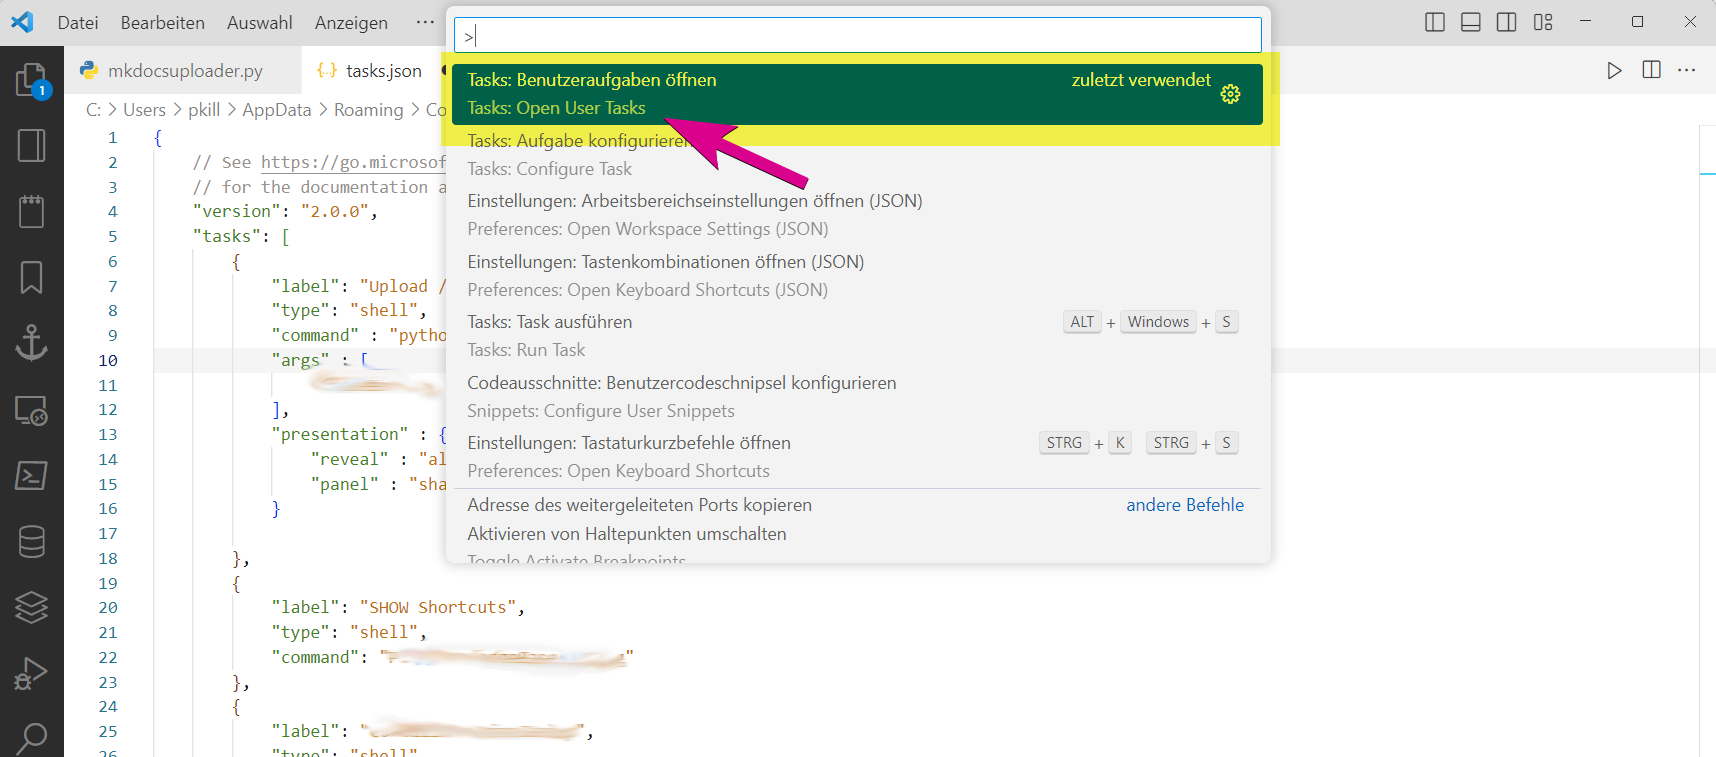
CTRL+SHIFT+P - TASKS: Open User Task
Now enter this JSON sequence in this file. Modify the command with the path to your mkdocsuploader.py script.
{
// See https://go.microsoft.com/fwlink/?LinkId=733558
// for the documentation about the tasks.json format
"version": "2.0.0",
"tasks": [
    {
        "label": "Upload / Build Webpage KILLERT",
        "type": "shell",
        "command" : "python",
        "args" : [
            "D:\\your\\path\\to\\mkdocsuploader.py"
        ],
        "presentation" : {
            "reveal" : "always",
            "panel" : "new"
        }
    },

    (...) There might be more sequences in this file
All details about this are described in this dedicated article "Tasks in Visual Studio Code". This is helpful if you might want to modify some of the settings.
Connecting a KEYBINDING to Task in Visual Studio Code
In Visual Studio Code you can create your own Keybindings. By opening the settings "Open Keyboard Shortcuts" CTRL + SHIFT + P you can enter a specification of a Task and it´s KeyBinding
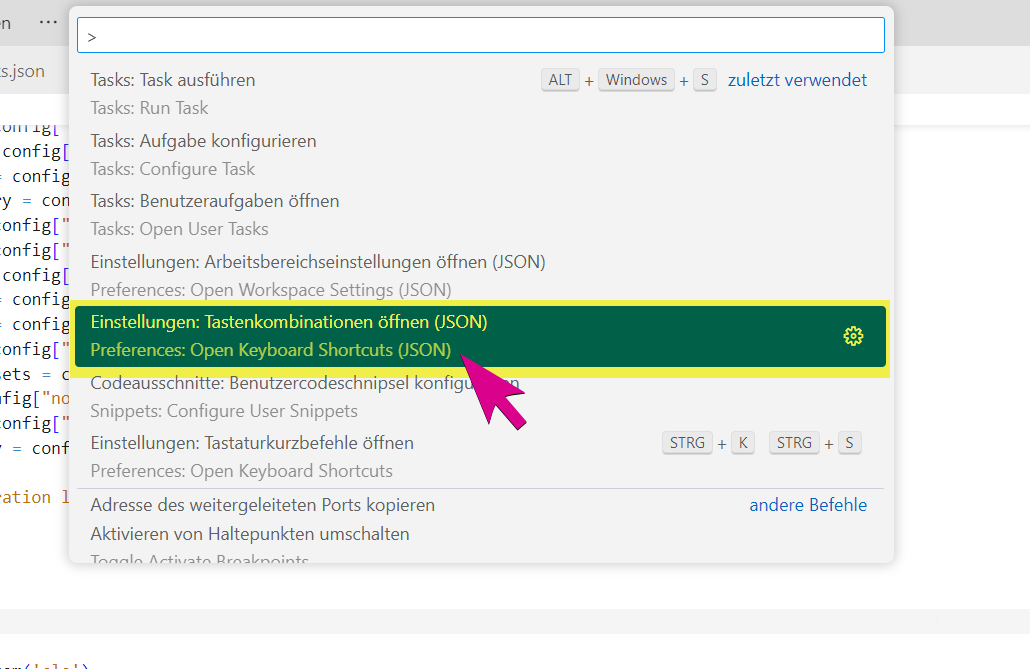
CTRL+SHIFT+P - Open Keyboard Shortcuts (JSON)
Now add this sequence. Make sure that the parameter added to "args" is exactly the name you specified when defining the TASK - in this example it´s Upload / Build Webpage KILLERT
{
    "key": "alt+numpad_subtract",
    "command": "workbench.action.tasks.runTask",
    "args": "Upload / Build Webpage KILLERT"

},
In this case the TASK of starting the mkdocsuploader.py script is executed everytime you hit ALT+NUMPAD-.
Additional Information
Please make sure that all parameters in mkdocsuploader_config.yml are entered in quotes. "true" or "false" must be written in low cases. The files mkdocsuploader_config.yml and mkdocsuploader.pyshould always be in the same directory. I recommend to put both files in the webpage directory although it would be possible, to run the script outside of your webpage directory if you have installed the python executable system wide in your path variable.